

 Send Email
 Whatsapp


Tips for Proper DC Solar Cable Installation
Tips for Proper DC Solar Cable Installation
Proper installation of DC Solar Cable plays a vital role in the performance and safety of your photovoltaic system. It ensures efficient energy transfer, reduces risks, and extends the lifespan of your setup. Neglecting proper practices can lead to costly errors, system inefficiencies, or even safety hazards. By adhering to proven methods, you safeguard your investment and optimize energy output. Every step, from cable selection to routing, directly impacts the system's reliability. Prioritize precision and quality during installation to achieve long-term success.
- Proper installation of DC solar cables is crucial for maximizing energy efficiency and ensuring the safety of your photovoltaic system.
- Select the right type and size of DC solar cables based on your system's voltage and current requirements to prevent overheating and energy loss.
- Thorough planning and preparation, including documenting cable routes and checking local codes, are essential for a successful installation.
- Maintain organized cable management to enhance safety and ease of maintenance, preventing wear and tear on cables.
- Regular inspections and maintenance of cables and connectors help identify issues early, ensuring long-term performance and reliability.
- Always prioritize safety by using appropriate protective gear and following local electrical codes during installation and maintenance.
- Consider upgrading or replacing cables as needed to keep your system efficient and compliant with current standards.
Understanding DC Solar Cables
What Are DC Solar Cables
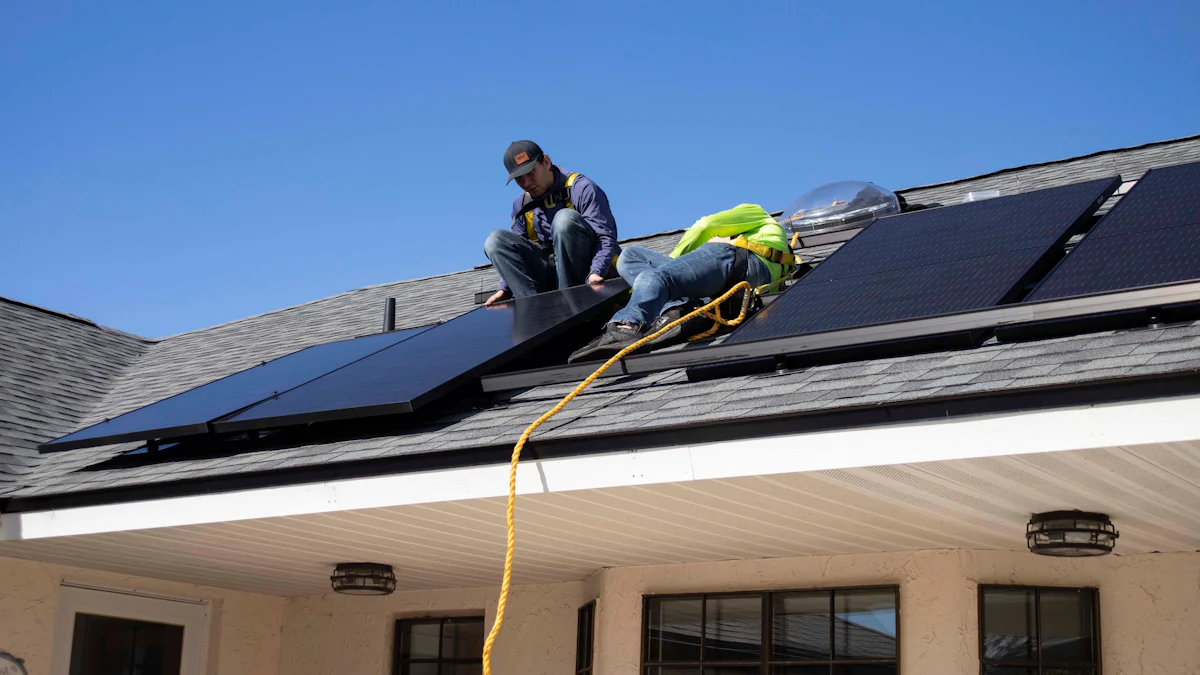
DC solar cables are specialized wires designed to connect various components of a photovoltaic system. These cables carry direct current (DC) electricity generated by solar panels to inverters or other system components. Their construction ensures durability and efficiency in outdoor environments. Unlike standard electrical wires, DC solar cables withstand extreme temperatures, UV radiation, and moisture.
You will notice that these cables often feature double insulation for added safety. This design minimizes the risk of electrical faults and ensures reliable energy transfer. The materials used in their construction, such as tinned copper conductors and cross-linked polyethylene (XLPE) insulation, enhance their performance. By using DC solar cables, you ensure that your photovoltaic system operates efficiently and safely under various conditions.
Types of DC Solar Cables
Understanding the types of DC solar cables helps you choose the right one for your system. The two primary types are single-core and twin-core cables. Single-core cables contain one conductor and are commonly used in most solar installations. They are lightweight, flexible, and easy to route through different setups. Twin-core cables, on the other hand, have two conductors within a single sheath. These are often used in systems requiring both positive and negative connections in one cable.
Another distinction lies in the cable's insulation and jacket material. Halogen-free cables are a popular choice due to their fire-resistant properties. These cables emit minimal toxic gases when exposed to high heat, ensuring safety during emergencies. Additionally, some cables are rated for underground use, while others are designed for above-ground installations. Selecting the appropriate type depends on your system's layout and environmental conditions.
When choosing a DC solar cable, consider its voltage rating, current-carrying capacity, and compliance with industry standards. Proper selection ensures optimal performance and reduces the risk of system failures. Always prioritize quality and compatibility to maximize the efficiency and longevity of your photovoltaic setup.
Preparation Before Installation
Proper preparation ensures a smooth and efficient DC solar cable installation process. By taking the time to plan, select the right materials, and gather the necessary tools, you can avoid common pitfalls and set your photovoltaic system up for success.
Planning the Installation
Start by creating a detailed plan for your installation. Assess the layout of your photovoltaic system and identify the optimal paths for cable routing. Consider factors like the distance between components, potential obstacles, and environmental conditions. A well-thought-out plan minimizes the risk of errors and ensures efficient energy transfer.
Document the placement of solar panels, inverters, and other components. Use this information to calculate the required cable lengths. Avoid underestimating or overestimating the length, as both can lead to inefficiencies. Additionally, check local electrical codes and regulations to ensure compliance. This step is crucial for maintaining safety and meeting legal requirements.
Selecting the Right DC Solar Cables
Choosing the correct DC solar cables is essential for the performance and safety of your system. Evaluate the voltage and current requirements of your setup to determine the appropriate cable size. Undersized cables can cause overheating and energy loss, while oversized cables may increase costs unnecessarily.
Pay attention to the insulation material and durability of the cables. Look for cables designed to withstand harsh outdoor conditions, such as UV radiation, extreme temperatures, and moisture. Halogen-free cables are an excellent choice for enhanced fire safety. Ensure the cables meet industry standards and certifications to guarantee quality and reliability.
Tools and Equipment Needed
Gathering the right tools and equipment simplifies the installation process. Essential tools include wire cutters, strippers, and crimping tools for preparing and connecting cables. Use a multimeter to test voltage and continuity during installation. Cable ties and clips help secure cables and improve cable management.
For safety, wear insulated gloves and use protective eyewear. A cable reel or dispenser can make handling long cables more manageable. Keep a labeling kit on hand to mark cables for easy identification. Having all the necessary tools ready ensures a professional and efficient installation.
"Preparation is the key to success." By planning carefully, selecting the right DC solar cables, and equipping yourself with the proper tools, you lay the foundation for a safe and effective photovoltaic system.
Step-by-Step Installation Tips
Connecting DC Solar Cables
Connecting DC solar cables requires precision and attention to detail. Begin by stripping the insulation from the cable ends using a wire stripper. Ensure you remove just enough insulation to expose the conductor without damaging it. Damaged conductors can compromise the connection and reduce efficiency.
Next, attach connectors to the stripped cable ends. Use crimping tools to secure the connectors firmly. A loose connection can lead to energy loss or overheating. After crimping, inspect the connection to confirm it is tight and free of gaps. Test the continuity with a multimeter to verify the connection is functional.
When connecting cables to system components, match the polarity correctly. Connect the positive cable to the positive terminal and the negative cable to the negative terminal. Reversing the polarity can damage the equipment or cause safety hazards. Double-check each connection before proceeding to the next step.
Managing Cable Routing
Proper cable routing enhances the efficiency and safety of your photovoltaic system. Start by planning the cable paths to minimize unnecessary bends and loops. Straight and organized routes reduce resistance and improve energy transfer. Avoid running cables near sharp edges or abrasive surfaces to prevent damage.
Secure the cables using cable ties or clips. Attach them to stable structures, such as mounting frames or walls. This prevents cables from dangling or moving, which could lead to wear and tear. Group cables together when possible to maintain a clean and professional appearance. Label each cable for easy identification during maintenance.
Keep cables away from heat sources and areas prone to water accumulation. Excessive heat or moisture can degrade the insulation and reduce the lifespan of the cables. If routing cables underground, use conduits to protect them from physical damage and environmental factors.
Ensuring Safety During Installation
Safety should remain your top priority during installation. Wear insulated gloves and protective eyewear to shield yourself from electrical hazards. Always work on de-energized systems to avoid accidental shocks. Use a voltage tester to confirm there is no current flowing before handling any cables.
Follow local electrical codes and standards to ensure compliance. These regulations provide guidelines for safe and effective installations. Inspect all tools and equipment before use to confirm they are in good condition. Faulty tools can lead to accidents or improper connections.
Maintain a clean and organized workspace. Keep tools and materials within reach but away from active work areas to prevent tripping hazards. If you are unsure about any step, consult a professional. Proper guidance ensures the installation is both safe and efficient.
"Safety is not an option; it is a necessity." By prioritizing safety, managing cable routing effectively, and ensuring secure connections, you create a reliable and long-lasting photovoltaic system.
Common Mistakes to Avoid
Improper Cable Sizing
Using the wrong cable size can lead to serious issues in your photovoltaic system. Undersized cables often overheat, which increases the risk of fire and reduces energy efficiency. Oversized cables, while safer, can unnecessarily inflate costs and complicate installation. To avoid these problems, calculate the voltage and current requirements of your system accurately. Use these calculations to determine the appropriate cable size.
Pay attention to the length of the cable as well. Longer cables experience higher voltage drops, which can affect system performance. Minimize voltage drop by selecting cables with the correct cross-sectional area. Always refer to industry standards and guidelines when sizing cables. Proper cable sizing ensures safe operation and optimal energy transfer.
Cross-Mating Connectors
Mixing connectors from different manufacturers or types is a common mistake that can compromise the reliability of your system. Cross-mating connectors often result in poor electrical contact, which increases resistance and causes energy loss. In some cases, mismatched connectors may not fit securely, leading to loose connections or even system failure.
To prevent this issue, use connectors that are compatible and meet industry standards. Stick to one brand or type of connector throughout your installation. Verify the specifications of the connectors to ensure they align with your system's requirements. Properly matched connectors enhance the safety and efficiency of your photovoltaic setup.
Poor Cable Management
Neglecting cable management can create safety hazards and reduce the lifespan of your system. Dangling or loosely routed cables are prone to wear and tear, which increases the risk of electrical faults. Poorly managed cables also make maintenance more difficult and time-consuming.
Organize cables neatly using ties, clips, or conduits. Secure them to stable structures to prevent movement or damage. Avoid sharp bends and excessive tension, as these can weaken the insulation. Label cables clearly for easy identification during inspections or repairs. Good cable management not only improves safety but also enhances the overall appearance of your installation.
"Attention to detail in cable management reflects the quality of your work." By avoiding these common mistakes, you ensure a safer, more efficient, and longer-lasting photovoltaic system.
Neglecting Voltage Drop Calculations
Ignoring voltage drop calculations can significantly impact the performance of your photovoltaic system. Voltage drop occurs when electrical energy dissipates as heat while traveling through cables. This loss reduces the efficiency of your system and can lead to underperforming components. You must account for this factor during the planning and installation stages to ensure optimal energy transfer.
To calculate voltage drop, you need to consider three key factors: cable length, current flow, and the cross-sectional area of the cable. Longer cables and higher currents increase voltage drop, while larger cable diameters reduce it. Use a voltage drop formula or an online calculator to determine the expected loss in your system. This step helps you select the right cable size and material for your specific setup.
Failing to address voltage drop can result in several issues. Your system may produce less power than expected, which affects its overall efficiency. Over time, components like inverters and batteries may experience strain due to inconsistent voltage levels. This can shorten their lifespan and increase maintenance costs. By minimizing voltage drop, you protect your investment and maintain consistent energy output.
Here are some practical tips to avoid voltage drop problems:
- Choose the correct cable size: Select cables with a cross-sectional area that matches your system's voltage and current requirements. Larger cables reduce resistance and improve energy transfer.
- Limit cable length: Keep cable runs as short as possible to minimize energy loss. Plan your layout carefully to avoid unnecessary extensions.
- Use high-quality materials: Opt for cables made from materials like copper, which offer lower resistance compared to alternatives like aluminum.
- Test your system: After installation, measure the voltage at different points to confirm that the drop is within acceptable limits.
"Small adjustments in planning can lead to significant improvements in performance." By addressing voltage drop calculations, you ensure your photovoltaic system operates efficiently and reliably.
Maintenance and Safety Tips
Regular Inspection and Maintenance
Regular inspections keep your photovoltaic system running efficiently and safely. Examine the cables for signs of wear, such as cracks, discoloration, or exposed conductors. Damaged cables can lead to energy loss or safety hazards. Check connectors for corrosion or loose fittings. Corroded connectors reduce energy transfer and may cause overheating.
Inspect the cable routing to ensure it remains secure. Look for sagging or displaced cables that could result from environmental factors like wind or animal interference. Re-secure any loose cables using ties or clips. Verify that all labels remain intact and legible for easy identification during future maintenance.
Clean the cables and connectors periodically. Dust, dirt, and debris can accumulate and affect performance. Use a soft cloth or brush to remove buildup. Avoid using harsh chemicals that could damage the insulation or connectors. Regular maintenance extends the lifespan of your system and ensures consistent energy output.
"A well-maintained system is a reliable system." By inspecting and maintaining your cables regularly, you prevent small issues from becoming costly problems.
Safety Practices for Long-Term Use
Safety should always be a priority when working with photovoltaic systems. Avoid handling cables or connectors with bare hands. Wear insulated gloves to protect yourself from electrical hazards. Ensure the system is de-energized before performing any maintenance. Use a voltage tester to confirm there is no current flow.
Keep cables away from areas prone to physical damage. Avoid placing heavy objects on cables or exposing them to sharp edges. Protect outdoor cables from UV radiation and moisture by using weather-resistant materials. If cables run underground, inspect the conduits for cracks or water intrusion.
Follow local electrical codes and standards to maintain compliance. These guidelines provide essential safety measures for long-term use. Educate yourself about potential risks and how to mitigate them. Proper safety practices protect both you and your investment.
"Safety is an ongoing commitment." By adhering to safety protocols, you ensure the longevity and reliability of your photovoltaic system.
Upgrading or Replacing Cables
Over time, you may need to upgrade or replace cables to maintain optimal performance. Aging cables can degrade due to environmental exposure or wear. Replace damaged or outdated cables promptly to avoid energy loss or safety risks. Use high-quality materials that meet current industry standards.
When upgrading, consider advancements in cable technology. Modern cables offer improved efficiency, durability, and safety features. Evaluate your system's current and future energy needs to select cables with appropriate specifications. Upgrading ensures your system remains efficient and capable of handling increased energy demands.
Dispose of old cables responsibly. Many cables contain materials that can be recycled. Contact local recycling facilities to learn about proper disposal methods. Sustainable practices benefit both your system and the environment.
"Upgrades are investments in efficiency." By replacing or upgrading cables as needed, you keep your photovoltaic system performing at its best.
Proper DC solar cable installation is essential for the safety, efficiency, and longevity of your photovoltaic system. By focusing on preparation, precise installation, and regular maintenance, you ensure optimal performance and reduce risks. Following best practices safeguards your investment and enhances energy output. Always prioritize high-quality materials that meet industry standards. When in doubt, seek professional guidance to avoid costly mistakes. Your commitment to excellence in installation and upkeep will result in a reliable and efficient solar energy system for years to come.
FAQ
What is the purpose of DC solar cables in a photovoltaic system?
DC solar cables transfer direct current (DC) electricity from your solar panels to other components like inverters or batteries. They ensure efficient energy flow and maintain the safety and reliability of your system. Their specialized design allows them to withstand outdoor conditions, such as UV radiation and extreme temperatures.
How do I choose the right size of DC solar cables?
You should select the cable size based on your system's voltage and current requirements. Undersized cables can overheat and cause energy loss, while oversized cables may increase costs unnecessarily. Use a voltage drop calculator to determine the correct cross-sectional area for your cables. Always follow industry standards to ensure safe and efficient operation.
Can I use regular electrical wires instead of DC solar cables?
No, regular electrical wires lack the durability and safety features required for photovoltaic systems. DC solar cables are designed to handle outdoor conditions, resist UV radiation, and prevent moisture damage. Using standard wires can lead to inefficiencies, safety hazards, and system failures.
How often should I inspect my DC solar cables?
You should inspect your cables at least once a year. Look for signs of wear, such as cracks, discoloration, or exposed conductors. Check connectors for corrosion or loose fittings. Regular inspections help you identify and address issues before they escalate into costly problems.
What tools do I need for DC solar cable installation?
Essential tools include wire cutters, strippers, crimping tools, and a multimeter. You will also need cable ties, clips, and a labeling kit for cable management. For safety, wear insulated gloves and protective eyewear. Having the right tools ensures a smooth and professional installation process.
How can I minimize voltage drop in my system?
To reduce voltage drop, use cables with the correct cross-sectional area and keep cable runs as short as possible. Plan your layout carefully to avoid unnecessary extensions. Opt for high-quality materials like copper, which offers lower resistance. After installation, test the voltage at different points to confirm minimal energy loss.
What are the common mistakes to avoid during installation?
Avoid using improperly sized cables, cross-mating connectors, and neglecting cable management. Ensure you calculate voltage drop accurately and follow local electrical codes. These mistakes can compromise the safety, efficiency, and longevity of your photovoltaic system.
Can I install DC solar cables underground?
Yes, you can install DC solar cables underground, but you must use cables rated for underground use. Protect them with conduits to prevent physical damage and water intrusion. Ensure the installation complies with local electrical codes for safety and reliability.
How do I safely replace damaged DC solar cables?
First, de-energize your system and confirm there is no current flow using a voltage tester. Remove the damaged cable and replace it with a new one that meets your system's specifications. Use proper tools to secure connections and test the system after replacement. If unsure, consult a professional to ensure safe and effective replacement.
When should I consider upgrading my DC solar cables?
You should upgrade your cables if they show signs of wear, fail to meet current energy demands, or do not comply with updated industry standards. Modern cables offer improved efficiency and durability. Upgrading ensures your system remains reliable and capable of handling future energy needs.