

 Send Email
 Whatsapp


How to Extend PV Cable Lifespan? 5 Maintenance Tips for Installers
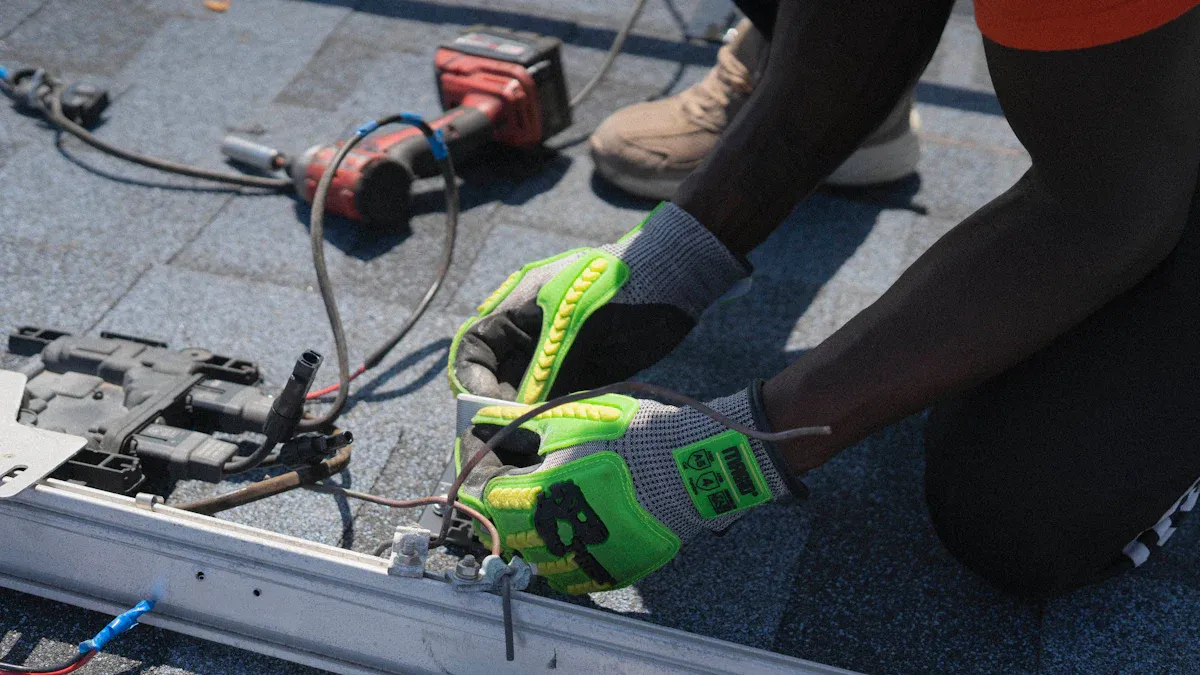
PV Cable integrity is paramount for your solar system's longevity. Diligent maintenance directly maximizesPV cable lifespan. You, as an installer, play a critical role. You prevent costly failures and ensure system safety for every installation.
Key Takeaways
- Manage cables well to prevent damage and ensure long-term performance.
- Protect cables from sun, water, and animals to keep them working longer.
- Check cables often for damage, loose parts, or hot spots to fix problems early.
Implement Optimal Cable Management to Extend PV Cable Lifespan
Proper cable management is crucial for your solar array. It prevents damage and ensures long-term performance. You directly impact the PV cable lifespan with good practices.
Maintain Proper Bending Radii
Avoid sharp bends in your PV cables. Tight angles stress the conductor and insulation. This stress can lead to cracks over time. Always follow the manufacturer's recommended bending radius. This keeps the cable's internal structure intact. You prevent premature cable failure.
Secure Cables with High-Quality Clips
Use durable, UV-resistant cable clips. Secure cables firmly to the racking or module frames. This prevents them from moving in the wind. Loose cables can rub against surfaces. This causes abrasion and insulation damage. Do not overtighten clips. Overtightening can pinch the cable and damage its jacket.
Ensure Adequate Cable Separation
Keep PV cables separated from each other. Do not bundle too many cables tightly together. Bundling can trap heat. High temperatures degrade cable insulation faster. Also, separate Power Cables from communication cables. This prevents electrical interference. Proper spacing reduces the risk of abrasion between cables. You protect the insulation from wear.Protect PV Cables from Environmental Degradation
Environmental factors significantly impact your PV cables. You must protect them from harsh conditions. This protection extends their life and maintains system performance.
Shield from UV Radiation and Direct Sunlight
Sunlight contains ultraviolet (UV) radiation. UV rays degrade cable insulation over time. This makes the insulation brittle and prone to cracking. You should use UV-resistant cables. These cables have special jackets that resist sun damage. You can also route cables in shaded areas when possible. Consider using conduit or cable trays. These structures offer physical protection from direct sunlight. They help preserve the PV cable lifespan.
Prevent Moisture Ingress and Water Damage
Water causes corrosion and short circuits. You must prevent moisture from entering cable connections. Use waterproof connectors. Ensure all connections are sealed properly. You can apply dielectric grease to terminals. This creates a barrier against water. Route cables so water drains away. Avoid creating low spots where water can collect. You prevent water from pooling around connections.
Guard Against Pests and Wildlife Damage
Animals like rodents and birds can chew on cables. This exposes conductors and creates hazards. You can use metal conduit in areas prone to wildlife. Install mesh barriers around cable runs. You can also apply animal-repellent coatings to cables. Regularly inspect for signs of animal activity. You protect your cables from physical damage.
Conduct Regular Visual Inspections for PV Cable Lifespan
You must regularly inspect your PV cables. These inspections help you catch problems early. Early detection prevents major system failures. It also significantly extends the PV cable lifespan. You ensure your solar system operates safely and efficiently.
Check for Physical Damage and Wear
Look closely at all cable runs. Search for any cuts, nicks, or abrasions. Animals can chew cables. Tools can accidentally damage them during installation or maintenance. Wind can cause cables to rub against sharp edges over time. Damaged insulation exposes conductors. This creates a serious shock hazard. It can also lead to dangerous short circuits. You must replace or repair any physically damaged cables immediately.
Inspect for Discoloration or Cracking
Observe the cable jackets carefully. Look for signs of discoloration. Fading or yellowing often indicates UV degradation. It shows the sun is breaking down the insulation material. Also, check for any cracks, especially at bends or stress points. Cracks mean the cable insulation has become brittle. This allows moisture to enter the cable. It severely compromises electrical safety and performance. Discolored or cracked cables need your immediate attention.
Examine Connectors for Corrosion or Looseness
Inspect all cable connectors thoroughly. Look for any green or white powdery residue. This indicates corrosion. Corrosion increases electrical resistance. It causes power loss. It can also create dangerous hot spots at the connection point. Ensure all connections feel secure and tight. Loose connections generate excessive heat. They can lead to arcing, which poses a significant fire risk. You should clean corroded connectors. Tighten any loose ones to maintain optimal system integrity and extend the PV cable lifespan.
Ensure Flawless Termination and Connection Integrity
You must ensure every cable termination and connection is perfect. This prevents power loss. It also stops dangerous electrical faults. Proper connections directly impact the PV cable lifespan.
Use Appropriate Crimping Tools
You must use the correct tools for crimping. Proper crimping creates a strong electrical connection. It prevents loose wires. Loose wires cause resistance and generate heat. Always use a crimping tool designed for your specific connectors. The tool must match the cable size. Calibrated tools ensure a perfect, reliable crimp every time. 🛠️ Never use pliers or incorrect tools. These create weak and unsafe connections. A good crimp directly extends the PV cable lifespan.
Verify Secure and Tight Connections
After crimping, you need to check your connections carefully. Loose connections are very dangerous. They can cause electrical arcing and create hot spots. These hot spots waste energy. They also pose a serious fire risk. Give each connection a gentle tug. It should feel firm and completely secure. You can also use a torque wrench. This ensures you tighten bolts to the manufacturer's exact specification. Do not overtighten. Overtightening can damage the connector or the cable itself.
Apply Weatherproof Sealing Techniques
Protect your connections from harsh weather. Moisture and dirt cause corrosion. Corrosion degrades system performance. It significantly shortens the PV cable lifespan. Use effective weatherproof sealing techniques. Apply heat shrink tubing over exposed connections. You can also use high-quality silicone sealant. Ensure the sealant completely covers all gaps and openings. For critical areas, use weatherproof junction boxes. These enclosures keep out water and dust effectively. Regularly inspect all seals for cracks or damage. Replace them promptly if needed.

Monitor System Performance for Early Detection of PV Cable Issues
You must continuously monitor your solar system's performance. This helps you find problems early. Early detection prevents major failures. It also protects your investment. You can identify issues before they become costly.
Identify Unexpected Voltage Drops
You should look for unexpected voltage drops. Voltage drops happen when electricity travels through a cable. A significant drop means something is wrong. It often points to increased resistance in your cables. This resistance can come from loose connections. It can also come from damaged insulation. You can use a multimeter to check voltage at different points. Compare these readings to expected values. Large differences signal a problem.
Recognize Hot Spots or Thermal Anomalies
You need to recognize hot spots. Hot spots are areas on cables or connectors that get too hot. They show up as bright spots on a thermal camera. These hot spots indicate high resistance. Loose connections or damaged cables create this resistance. Hot spots can degrade insulation quickly. They also pose a serious fire risk. You should use thermal imaging during inspections. This helps you find these dangerous areas.
Track Energy Production Deviations
You must track your system's energy production. Compare actual energy output to expected output. A sudden drop in production can signal cable issues. For example, a damaged cable might cause intermittent power flow. This reduces overall energy generation. You can use monitoring software to track these deviations. Consistent underperformance often points to underlying problems. Addressing these issues helps extend the PV cable lifespan.
Consistent PV cable maintenance ensures system reliability. You safeguard long-term performance and safety. Proactive maintenance is a strategic investment. It extends your solar installation's life. You prevent costly issues.
FAQ
How often should you inspect PV cables?
You should inspect PV cables at least once a year. More frequent checks are good in harsh environments. This helps you catch problems early.
What are the signs of UV damage on PV cables?
UV damage shows as discoloration or cracking. The cable jacket might look faded or yellow. It can also feel brittle to the touch.
Can you repair damaged PV cable insulation?
You can often repair minor insulation damage. Use UV-resistant electrical tape or heat shrink tubing. For severe damage, you must replace the cable section.